Easy Flavoring for Vape Juice From Groccery Store
THE BEGINNERS GUIDE TO DIY EJUICE:
HOW TO MAKE 30+ DIFFERENT EJUICE FLAVORS WITH ONE RECIPE
50VG/50PG
We here at Vaporleaf understand that it can be hard for some people to find an eJuice that is just right for them and we sympathize with those who are panicking about where to find a new favorite once we close down our website. So, we wanted to give everyone one more option and decided to release a simple 'How to DIY eJuice Guide' in addition to simplified versions of our recipes. This way, if you are in the group of people who just cannot even think about living without your favorite Vaporleaf eJuice, you can try to make it yourself at home with our easy recipe!
Now, you might be thinking, "making eJuice is so complicated" or "this will be so expensive" or some other negative notion – think again! We have fully simplified some of our recipes so that it will be as easy as possible for you to create your own eJuice. All you will need is four standard ingredients, a few supplies, a little bit of time, and with this cheat sheet you will be able to make over 30 different eJuices!
To prepare for your DIY adventure, you will need to familiarize yourself with the ingredients of eJuice, if you aren't already. To kick things off, the four standard ingredients that make up all eJuices are vegetable glycerin, propylene glycol, flavoring, and nicotine. Keep reading to find out more about these four ingredients or simply skip further down to the "Shopping List" section.
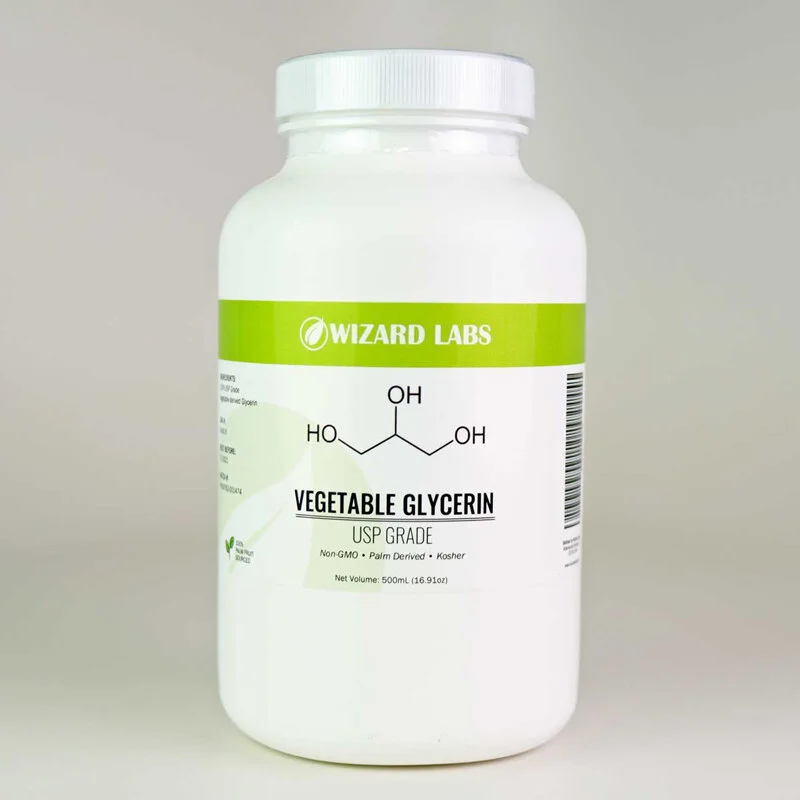
This is the Vegetable Glycerine that we reccommend using.
Vegetable Glycerin (mostly seen abbreviated as VG within the vaping community): The VG that we use and suggest using is approved by the USP (United States Pharmacopeia Convention). VG has many purposes throughout the world such as in foods and beverages, it serves as a humectant, solvent, and sweetener, and may help preserve foods. You can also see Vegetable Glycerin used in medical, pharmaceutical, and personal care preparations, mainly as a means of improving smoothness, providing lubrication and as a humectant.
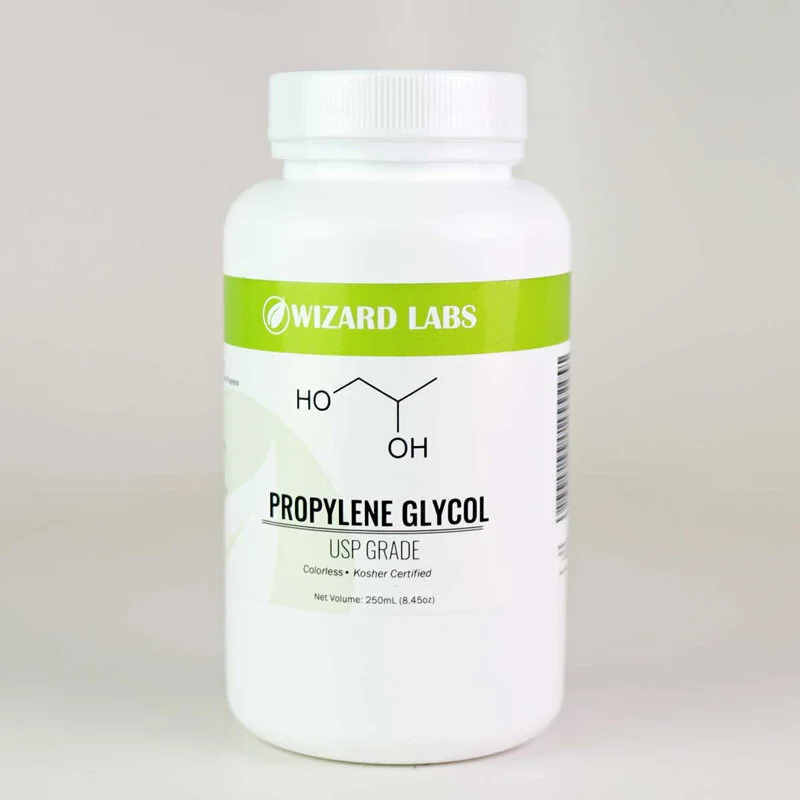
USP grade Propylene Glycol from Wizards Labs.
In eJuice, Vegetable Glycerin is used to create a smooth vaping sensation while producing a thick vapor cloud – the more VG content present, the thicker the cloud and the smoother the hit will be. VG is a thicker viscosity liquid and when a higher concentration is used in a recipe, you should use a vape with a higher power level to properly vaporize the liquid (and vise-versa).
Propylene Glycol (mostly seen abbreviated as PG within the vaping community): PG is considered generally recognized as safe (GRAS) by the U.S. Food and Drug Administration. In addition, the PG we use and suggest using for DIY eJuice is approved by the USP (United States Pharmacopeia Convention).
PG is a solvent in many pharmaceuticals, including oral, injectable, and topical formulations, such as for diazepam and lorazepam that are insoluble in water, propylene glycol is used as a solvent in their clinical, injectable forms. Do not be afraid of the chemistry term "solvent" it simply means, the substance in which the solute is dissolved. An example would be "water" is the solvent in which sugar and flavoring are combined to make a drink mix.
The nicotine used in our eJuice is derived from food products, as well as tobacco, and is both GCMS and COA tested. Did you know, nicotine naturally occurs in many common foods? Some of these foods include tomato, potato, eggplant, peppers, and cauliflower!
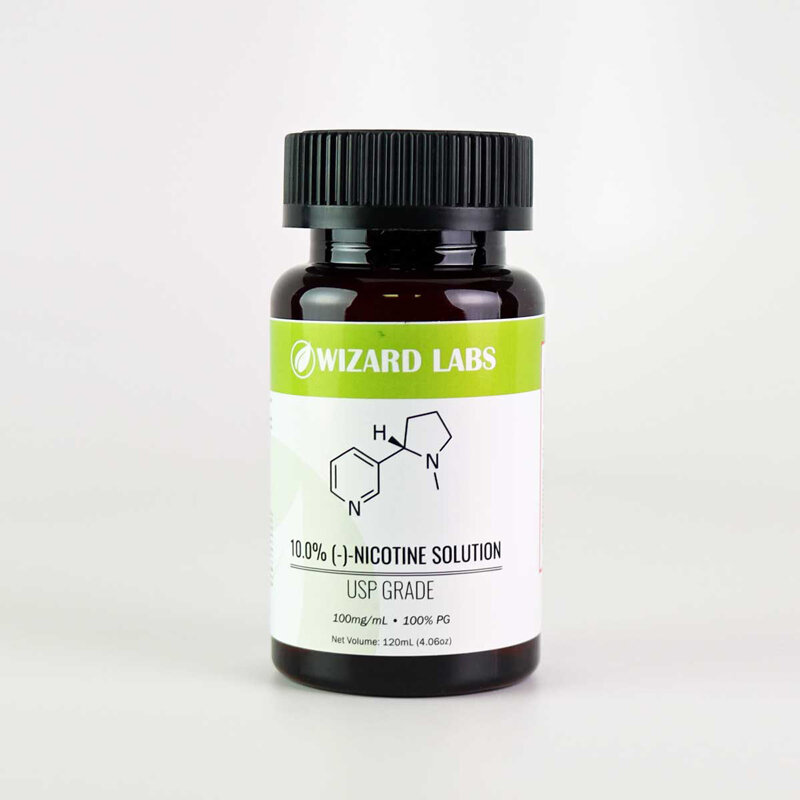
Remember to handle this with care. It looks harmless, but can very dangerous.
Nicotine: Nicotine is generally found diluted with either a VG or a PG base when looking for DIY supplies. The base liquid will not affect the nicotine's strength in your juice, but your base will affect other aspects of your juice, such as what the ratio of VG to PG ends up as and minor changes in flavor. We use the 100mg/mL nicotine strength with a PG base fluid, 100mg/mL does not pertain to the strength of your finished eJuice - only to the strength of the base fluid. We will talk a lot more about measurements later in this guide.
Tip: Nicotine will darken and develop a slight off flavor with age. You can store the nicotine in a refrigerator or freezer to prevent the aging process.
***Please remember that when dealing with a nicotine concentrate, even when diluted like this is, can still be harmful. We stress that you keep this away from children and pets and avoid contact with your skin and eyes.***
If you don't plan on using nicotine in your ejuice, then that's just fine. A lot of people vape 0mg eJuice, so you're not alone. It's still a good idea to learn about this though, just in case you ever plan on using nicotine or making eJuice for a friend.
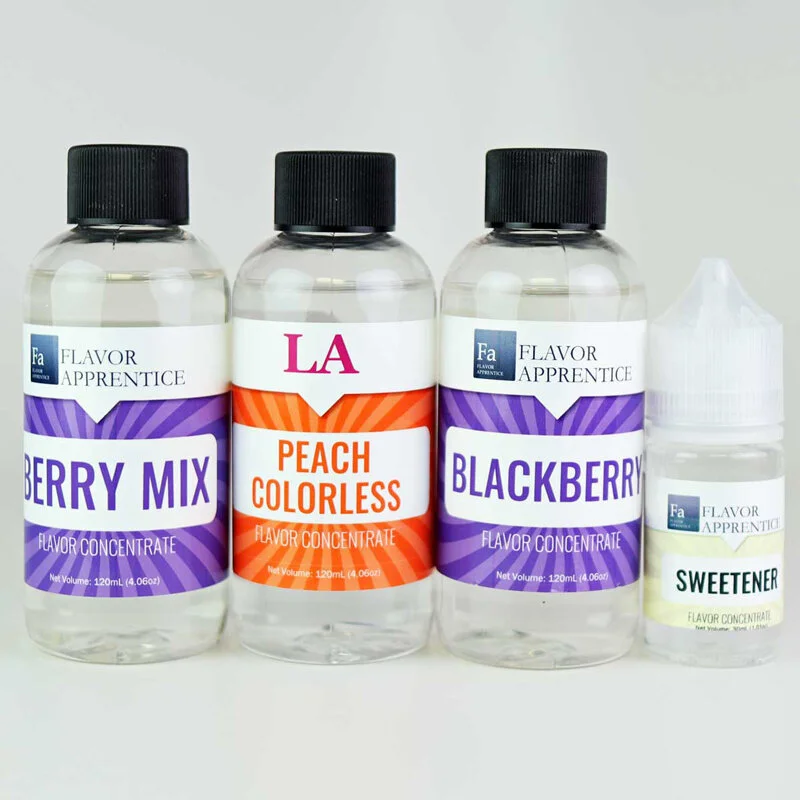
A small variety of flavorings. If you stick with DIY ejuice for a while you'll have tons of these.
Flavor concentrates: Flavor concentrates generally consist of natural and artificial flavoring, propylene glycol (PG), water and alcohol. Both natural and artificial flavors are used for our Vaporleaf eJuices, but we only use (and recommend using) food grade and pharmaceutical grade FDA approved flavorings. Using flavorings that are not food and pharmaceutical grade can be risky as you do not know all the ingredients or chemicals used or the effects of putting those ingredients in or on your body. Grocery store bought flavorings are generally low in flavor concentrate and high in alcohol content which evaporate off when baking. These are not suitable or safe for vaping products.
Sweetener: Sweetener in vape juice is generally used to offset the chemical taste of flavor concentrate and to provide a sweet undertone. Like the way sugar is used to sweeten a packet of drink mix. Too much sweetener will diminish the flavor and shorten your coil life. We use a liquid form of sucralose to sweeten our eJuices.
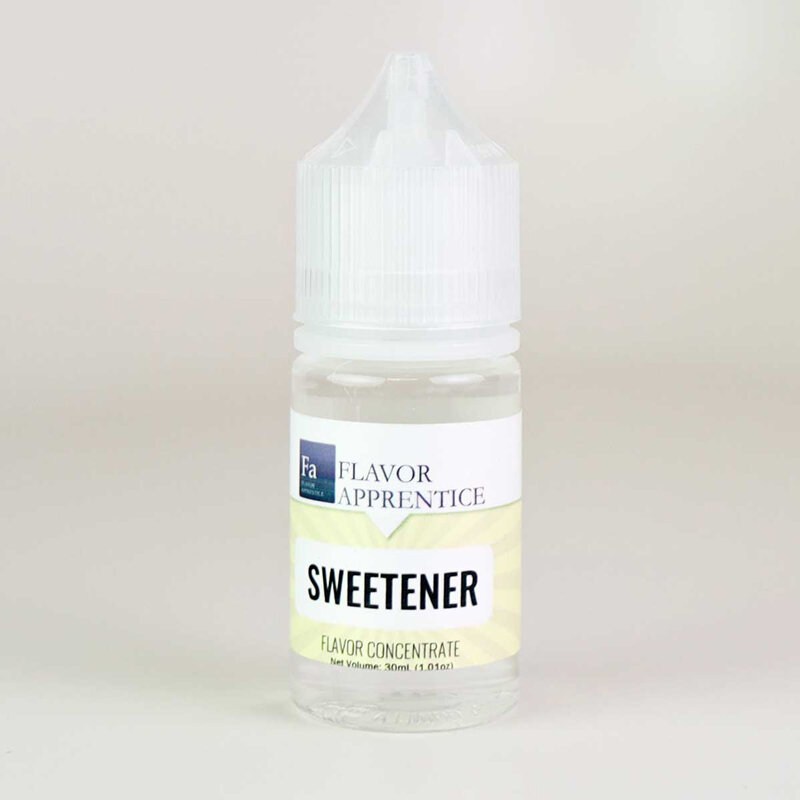
A little sweetener goes a long way.
Tip: DO NOT FREEZE the flavor concentrates or the sweetener. Freezing can cause the flavors to precipitate out of the solution or to lessen the flavor strength. Refrigeration is the preferred method for extending shelf life.
A small amount of vodka and distilled water is also used as an emulsifier (an emulsifier is an additive that helps two liquids mix). We use a vodka and distilled water mix to help the essential oil and/or natural flavor concentrates blend better into the solution.
TIP: You can substitute PG for the vodka and distilled water in most of our recipes. If you notice separation of the flavor concentrate, just shake the bottle to mix and next time add the vodka/distilled water instead.
SHOPPING LIST:
Please be safe when picking out ingredients for your eJuice, we recommend using https://wizardlabs.us for the bulk of your ordering. However, some flavorings will have to be purchased from either https://flavorjungle.com, and/or https://www.diyvaporsupply.com (both of which are recommend companies as well).
They have all the USP grade / food grade ingredients and all the supplies you will need to create your own mini at home DIY eJuice lab. Speaking of supplies, following is a shopping list of everything you will need to mix up your own eJuice.
Tip: buying glass materials instead of plastic will be more beneficial, as glass is a smoother surface so you can keep it cleaner and you have less residual liquid staying on it at the end; you can also reuse glass indefinitely whereas plastic begins to breakdown after so long.
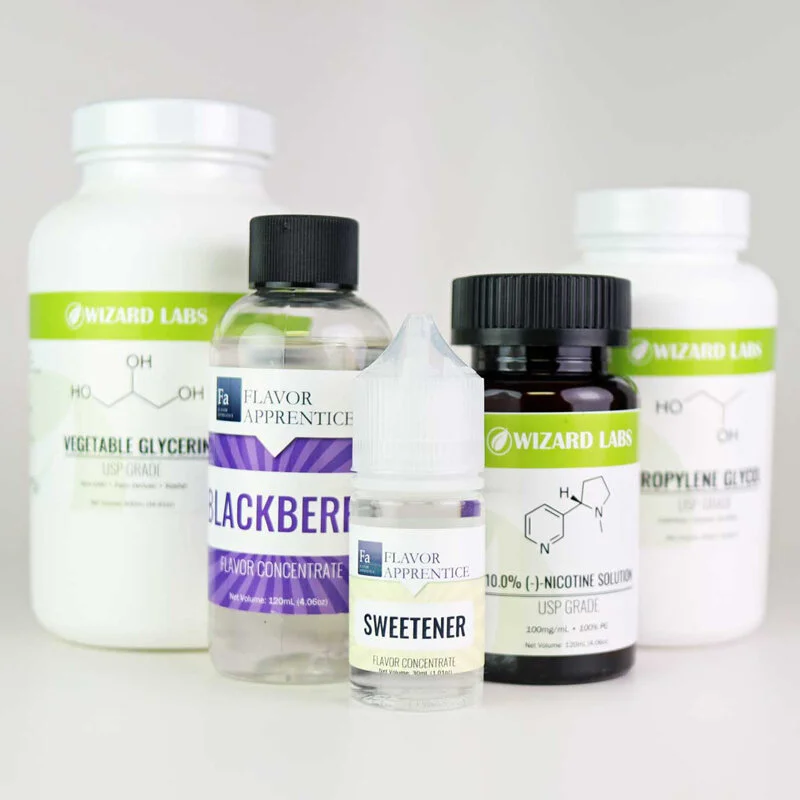
These are some of the ingredients you'll have after you go shopping.
(Total Supplies Cost ~ $65 / Price per Bottle ~ $10 - $12)
CONSUMABLES: (Cost ~ $40-45)
• 30ml bottle - Liquid Sucralose Sweetener – made by The Flavor Apprentice.
• Small bottle - Vodka – we use SKYY, a small bottle will do.
• Small bottle - Distilled water – a small bottle will do.
• 500ml container - Vegetable Glycerin – size depends on how much you want to make, exact amounts needed will be found with the recipes later in this guide. (A 500ml bottle of VG will yield you 4-6 4oz bottles of finished eJuice, depending on nicotine level.)
• 250ml container - Propylene Glycol – size depends on how much you want to make, exact amounts needed will be found with the recipes later in this guide. (A 250ml bottle of PG will yield you 4-6 4oz bottles of finished eJuice, depending on nicotine level.)
• 120ml container - Nicotine – USP Nicotine Solutions - 100mg/mL nicotine with a PG base fluid. (A 4oz bottle of nicotine will yield you 4-30 4oz bottles of finished eJuice.)
• 120ml container - Flavoring - food grade and pharmaceutical grade FDA approved, exact flavors and amounts will be found later in this guide. (A 4oz bottle of flavoring will yield you roughly 6-7 4oz bottles of finished eJuice.)
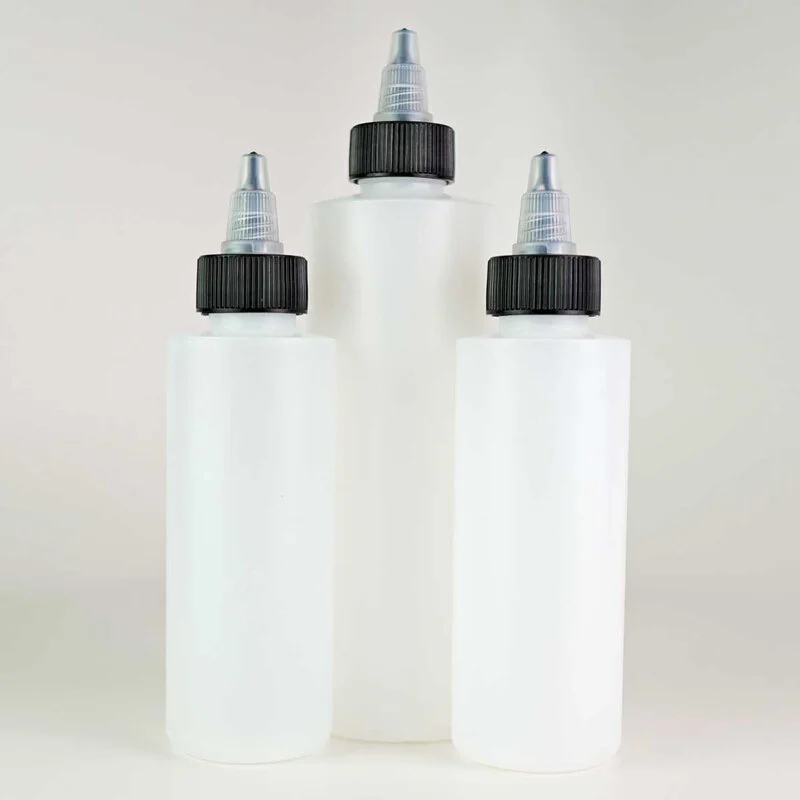
These bottles are what you'll be mixing and steeping your eJuice in.
LAB SUPPLIES: (Cost ~ $20)
• (x1) Sharpie and Scotch/Packing Tape – used to label supplies.
• (x3) 3ml luer lock syringe – used for sweetener, vodka, and distilled water.
• (x3) 30ml luer lock syringe – used to measure out the nicotine, flavoring, and PG.
• (x6) 14g luer lock needle – to attach to syringes.
• (x1) 125ml HDPE Bottle - this will be your mixing/steeping bottle. You may want more than one or to shop for a larger size if you are planning to make large batches. (MUST BE HDPE OR GLASS AS THIS WILL BE HEATED)
• (x1) 250ml HDPE Bottle - to transfer VG into for easier pouring
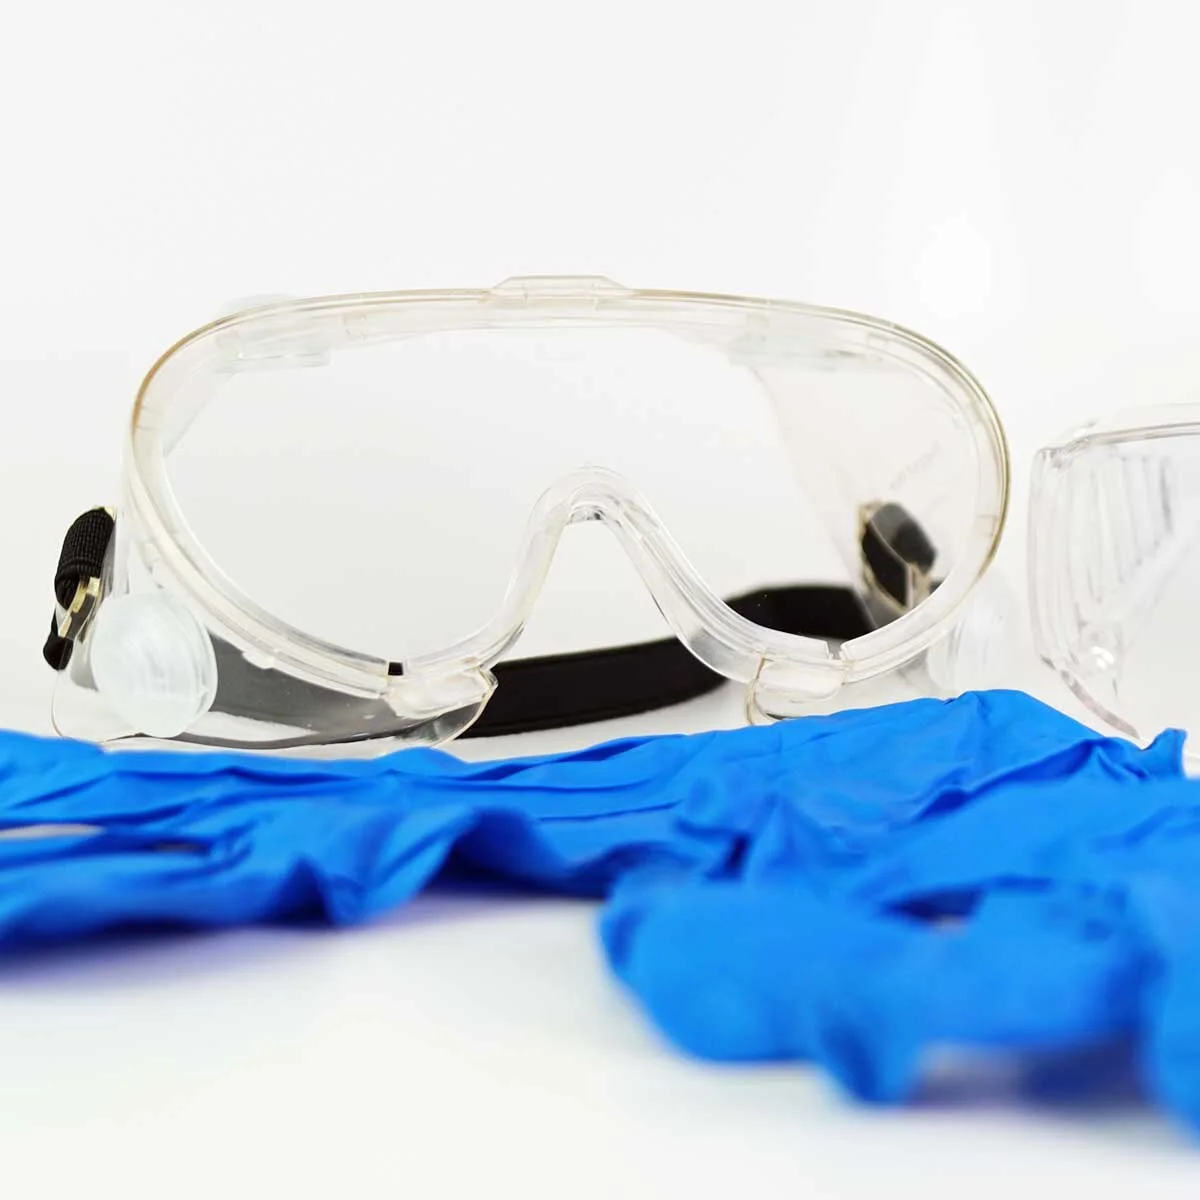
Remember people: Safety first! You'll look goofy but not hurting yourself is worth it!
-
Gloves and Goggles - to use when handling nicotine. (We also recommend keeping a bottle of eye wash on hand, in case of contact with nicotine.)
Tip: the syringes can come apart for easier cleaning. The syringes will last longer if you pull them apart and clean each piece thoroughly after each use.
PREPARATIONS:
1) You need to start by marking some lines on your 125ml (4oz) mixing bottle(s). These lines are where the PG and VG products should fill up to and you will use this an extra double check method. To do this:
a) Use your syringes to measure out 62.5mls of water (the 30ml syringes you purchased from Wizard Labs go up to 35ml, you can use this syringe to measure out 32.5ml and then again for the remaining 30ml). Deposit that into your mixing bottle.
b) While the bottle is on a level surface, use a sharpie to mark a clear, thick line at that 62.5ml level.
c) After you have marked that line, repeat steps 'a' and 'b' to add an additional 62.5ml of water into your mixing bottle.
d) Once you have the additional 62.5ml added to the bottle, mark a clear, thick line at that top level. (This is at 125ml so it should be right around the shoulder of the bottle.)
e) Now that you have those 2 lines marked on your bottle, you can empty the water and dry out the bottle and syringes as much as possible before continuing.
f) Place a layer of clear tape over your markings so they do not come off during cleaning.
Tip: If you are making a larger sized batch, you will need to change the markings to fit accordingly. There should be a mark at exactly halfway as well as a mark where the bottle is "full".
2) Using the sharpie, label your individual syringes so you can avoid mix ups and cross-contamination. Cover with a layer of clear tape to avoid the labels coming off during cleaning. The syringes should be labeled as follows:
• (x1) 3ml syringe – "Sweetener"
• (x1) 3ml syringe – "Vodka"
• (x1) 3ml syringe – "Distilled Water" or "D. Water"
• (x1) 30ml syringe – "Flavoring" (if you plan to make other flavors, label with specific flavor, ex: Banana Cream – always use different syringes for different flavors)
• (x1) 30ml syringe – "Nicotine"
• (x1) 30ml syringe – "PG"
3) Using the sharpie, label your 250ml (8oz) pour bottle: "VG" or "Vegetable Glycerin". Once labeled, cover with a layer of clear tape to avoid the label coming off and transfer the VG into this bottle. (This will make it easier to pour into your mixing bottle.)
4) We recommend setting up your DIY eJuice station in the most sterile environment possible to avoid any contaminants. Make sure to keep your supplies stored in an area that is safe from children and pets.
5) Place your VG, that is in the 250ml HDPE bottle, in a warm bath to heat up a little before you use it. The VG is a very thick liquid and can be difficult to pour when at room temperature.
EJUICE MAKING DIRECTIONS:
Once you have all your supplies prepped, we can begin the actual process of making your own eJuice!
First and foremost, wash your hands and put on a pair of gloves and your safety goggles. These precautions are to protect your hands and eyes if any nicotine gets on them.
TIP: Rinse out any empty bottles before use. You may want to sterilize the bottles with an isopropyl alcohol/rubbing alcohol wash followed by two water rinses.

Your first step will be to measure out your nicotine, so use your 30ml nicotine syringe and blunt tip needle with the following chart to draw up the correct amount of nicotine for your desired nicotine level and bottle size: (all measurements are rounded to the nearest 0.5ml)
TIP: To purge the excess air in the syringe, draw up some liquid into the syringe, while keeping the tip of the syringe in the liquid push the liquid out rapidly. Repeat this step 3 to 5 times and the air should have been jetting out of the syringe without the risk of getting in your eye. DO NOT HOLD AT EYE LEVEL AND FLICK THE SYRINGE.
Once you have double checked that you drew up the correct amount of nicotine in the syringe, deposit that into your mixing bottle and put that syringe to the side so you do not mix it up with your others. Now to add your flavoring.
We have completely simplified our recipes for you and have made a basic guide as to how much flavoring to add to each bottle size. Due to this, our flavors might taste a tiny bit different compared to what you remember getting in-store. After your first attempt of making your own eJuice, you can decide if the flavoring amount is right for you, or if you want to change those amounts a little. That is the fun part about DIY eJuice, you can change the flavoring to exactly what tastes good to you!

Following is a guide of how much flavoring to add to your desired bottle size according to your nicotine level, use this with your 30ml flavor syringe and blunt tip needle to draw up the correct amount of flavoring: (all measurements are rounded to the nearest 0.5ml)
Tip: Specific names and brands of which flavor concentrates to use with this recipe will be found at the end of this guide. Please do not try this recipe with menthol or cinnamon flavors as it will be incredibly harsh.
Once you double check that you have the correct amount of flavoring concentrate in the syringe, add that into your mixing bottle with the nicotine you previously added. Put that syringe to the side and now we move onto the sweetener.
We use a liquid form of sucralose to sweeten our eJuices, made by a company called The Flavor Apprentice. Here is a link to their smallest bottle available, click here. We only use a small amount, so that little bottle will last you quite a while.

Now, grab your 3ml sweetener syringe with a blunt tip needle and use the following guide to draw up the correct amount of sweetener for the bottle size you are making.
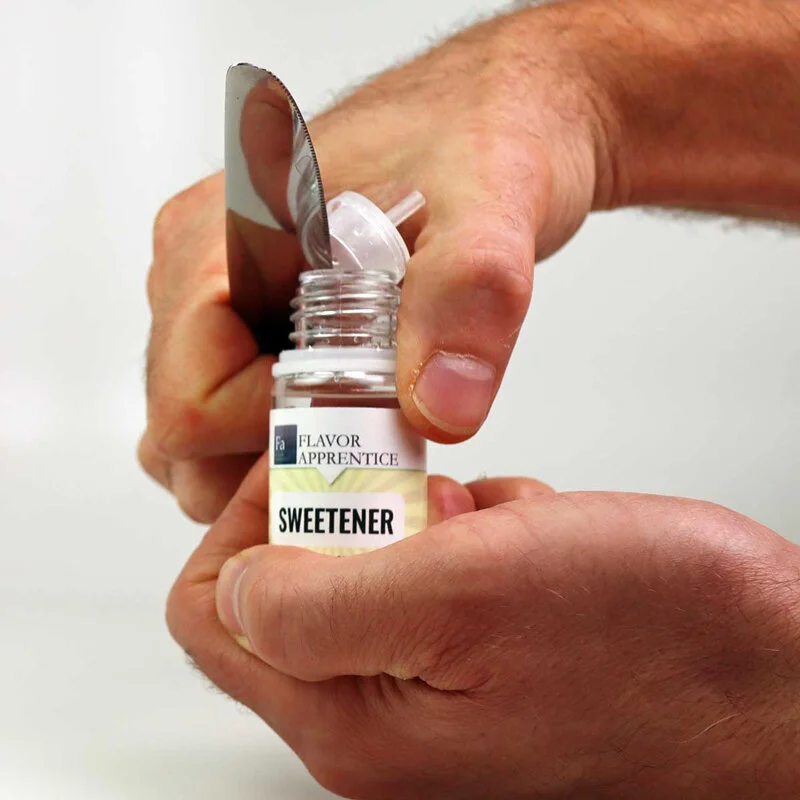
You'll want to place the edge of the knife in the seam between the cap and the bottle, then pry upwards.
Tip: Use a butter knife to pry the tip off the bottle.
After making sure that you have drawn up the correct amount of sweetener in the syringe, deposit that into the mixing bottle with the other two ingredients. Set that syringe to the side, and now we move on to the Vodka.
As stated previously, we use SKYY Vodka, but you can use pretty much any unflavored Vodka (we do recommend sticking with one around 40% ABV, which is most brands). Now, grab your 3ml vodka syringe with a blunt tip needle and use the following guide to draw up the correct amount for the bottle size you are making.
TIP: You can use the caps of the vodka or distilled water bottles to pour the liquid into before trying to use the syringe.

After double checking that you have drawn up the correct amount of Vodka in your syringe, add that to the mixing bottle with your other ingredients. Set that syringe to the side, and now we can measure up our distilled water.

With your 3ml distilled water syringe and blunt tip needle, use the following guide to draw up the correct amount of distilled water for the size of bottle that you are making.
Once you made sure that you have drawn up the correct amount of distilled water in your syringe, add that to the mixing bottle with your other ingredients. Now we just need to add the PG and VG, steep the eJuice and you are done, we are almost there!
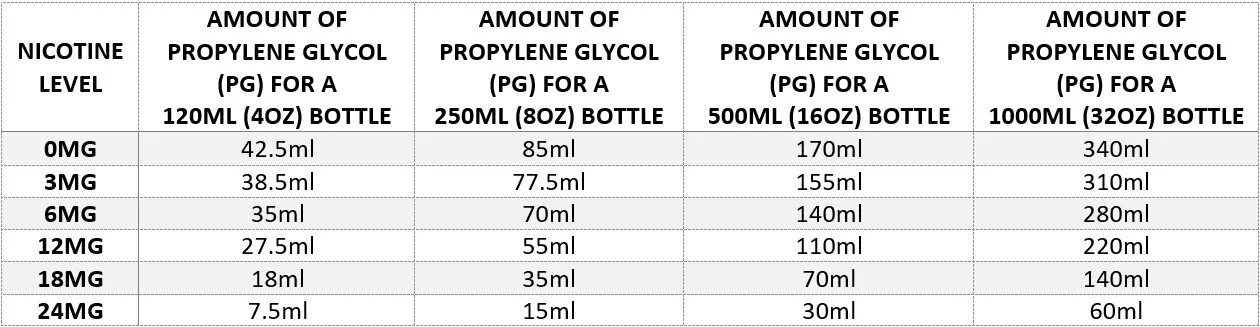
Use the following guide along with a 30ml syringe and blunt tip needle to help you measure out the correct amount of USP Propylene Glycol needed for your desired nicotine level.
Double check that you measured out the correct amount before continuing, then deposit the PG into your mixing bottle. Now that you have all your "PG products" in your bottle, it should be exactly halfway full (at the 62.5ml line you marked on your bottle in the preparations step). If you are a ml or two off there is nothing to worry about, however if the amount is drastically off, you may want to start again.
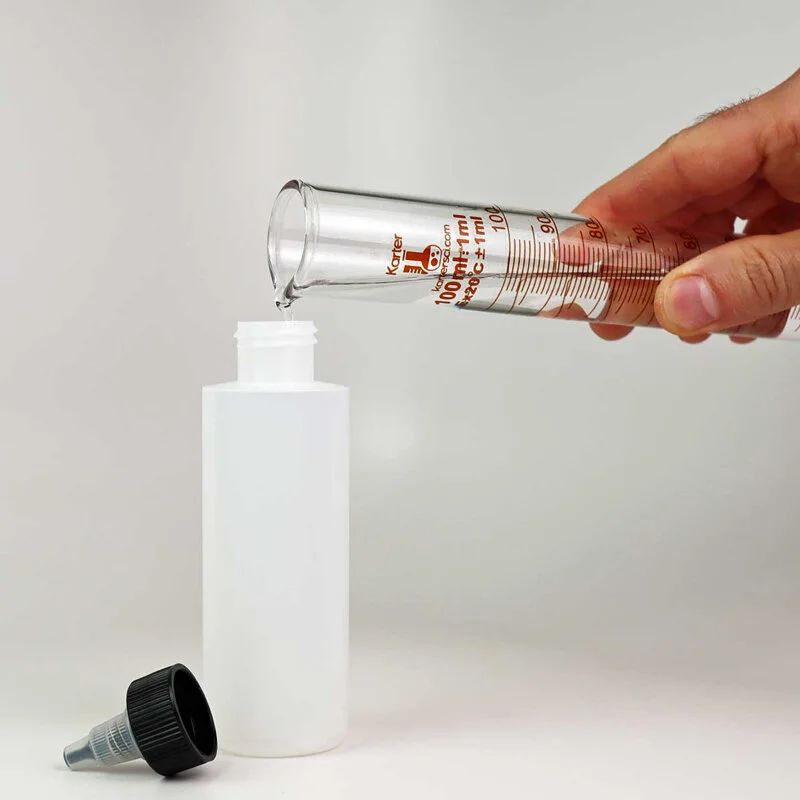
Pouring ingredients into the mixing bottle. A graduated cylinder isn't required, but we use one just to be a bit more precise. Also, this was the only picture we had of ingredients being poured into the mixing bottle.
Now that you have all your PG products in the bottle, all that is left to add is the VG! Since the bottle is exactly halfway full, you can simply pour the VG straight into the mixing bottle until it reaches the mark at the top of the bottle!
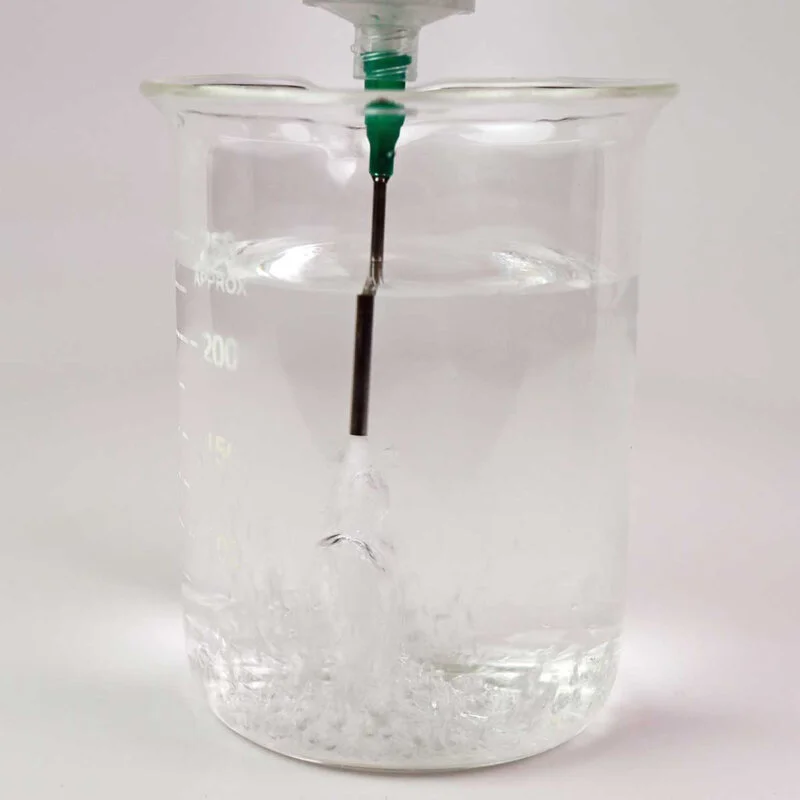
At last, you should have all the ingredients in your mixing bottle, it is time to shake and steep it! Your mixing bottle should have come with a cap, screw that back on all the way and give that bottle a really good shaking (think early 2000's shake weights). After you have shaken that bottle up for a few minutes, we need to steep it for about an hour.
Steeping is the process of letting your eJuice flavors fully disperse into all the other ingredients either in a warm bath or by letting it sit for an extended period. We prefer using the method of the warm bath because you get the best results a lot faster, making your eJuice taste its best without having to wait a couple weeks for those results.
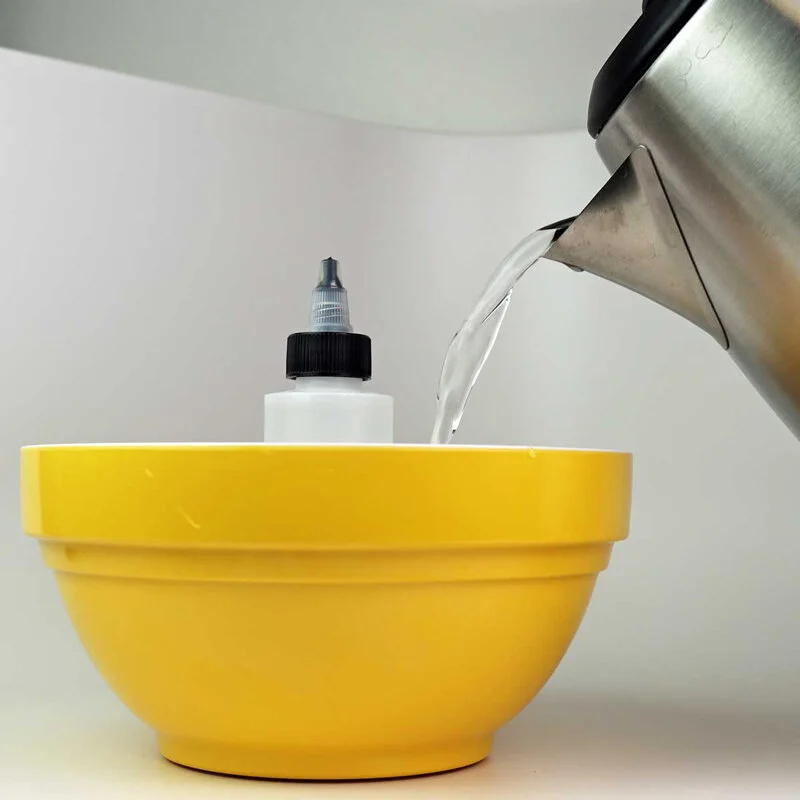
You'll want to fill the bowl with hot, but not boiling water, until about the halfway mark on the bottle of eJuice. If you're not using the recommended bottle, this step will warp or slightly melt your bottle.
To steep a single bottle, use a tea pot or similar hot water device to bring the water up to tea making temperatures. Place the bottle with the cap on into a bowl. Pour the hot water into the bowl until the eJuice bottle is half submerged. Now cover with another bowl or towel. For larger batches of eJuice a crock-pot or instant pot with a couple inches of water and heating on low/medium can be used.
Let it sit in there for about an hour, when you go back to check on it you should expect the bottle to be warm but not too hot to handle in your hands. While you are waiting for the bottle to steep, this is a great time to clean up all the supplies you used. Be sure to wash and rinse everything that you used very thoroughly to avoid any future contamination and to make your supplies last if possible.
Tip: if you do not use an HDPE or glass mixing/steeping bottle, the plastic will warp and contaminate your eJuice.
Once the bottle is decently warmed, take it out and you need to give it another good shaking just like earlier. After a few minutes of shaking, let the bottle sit in room temperature to cool down before you use it. Just like that you have created your own DIY eJuice! See, it is not as hard as you thought it was.
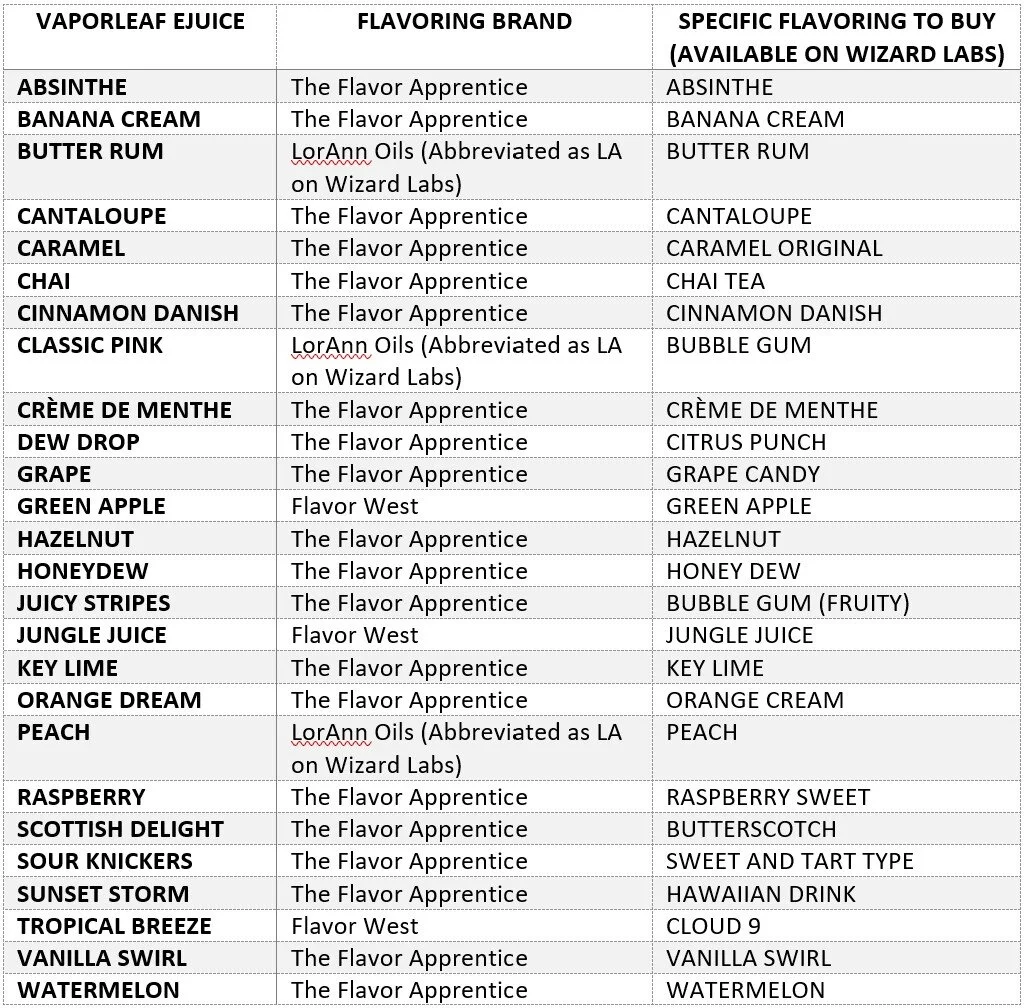
The best part is this simple recipe will work for over 30 different 50/50 blend flavors, most of which you can buy with the rest of your supplies on Wizard Labs! Following is a list of all the Vaporleaf eJuices that this recipe will work for, along with which brand we prefer using and the specific flavoring to buy. Keep in mind that different brands of the same type of flavoring can have a different taste, this is why we provide the specific brand along with the specific flavoring.
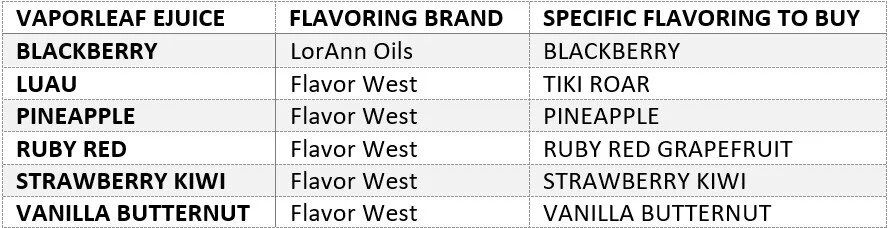
* Blackberry by The Flavor Apprentice can be substituted for the LorAnn Oils Blackberry. The TFA Blackberry is a little tarter and more natural tasting.
Source: https://blog.vaporleaf.com/beginners-guide-to-diy-ejuice
Belum ada Komentar untuk "Easy Flavoring for Vape Juice From Groccery Store"
Posting Komentar